back

Quite a lot of time did I spend on that one and I guess this is gonna be
my favorite platform for trying things out or just for senseless coding hours.
I tried several times writing a 3D Graphics Engine for Dreamcast.
The very first version was written in C but I rapidely switched to C++ (and a lot of assembly..).
It now consists of asynchronous file loaders, simple thread support, a scene graph renderer
and a strange multi texturing material system that needs a redesign.
The graphics data is created with Cinema 4D and exported with a custom plugin.
I am currently thinking about a realtime plugin for Cinema that sends modification
parameters for the running scene over to the Dreamcast target, so you can change things in Cinema
and see the changes on the Dreamcast in realtime.
Below are some screenshots and some descriptions of my work so far.


On Sega Dreamcast you must clip all polygons at least against the z near plane
witch can break up all the nice flowing TnL code. Also, since you're working with triangle strips
most of the time, you somehow have to take care of breaking up a strip into single polygons and stuff.
The right picture shows some strange mipmapping behaviour on clipped polygons I've not figured out yet.


Before we can do some stencil based volume shadows we first must find the object outlines and then
extrude a shadow volume with some special polygons. Stencil shadows on Dreamcast are quite easy to do but they have their drawbacks. The biggest disadvantage is that you have only one type of volume witch tells the other polygons whether they are inside a volume or not. However, the results tend to look quite impressive...


...until you quickly run into some problems. First, you can have as many volumes inside the scene as you want. But
the polygons of one volume must not cross, i.e. it must be convex. As far as I could figure out there are only two solutions to the torus problem you can see above. Either you break up the torus into multiple segments and let each segment cast a different volume,
or you create a different volume for each backfacing polygon, which tends to slow down the rendering on the graphics chip a lot.

And there is one more major problem. Notice the wrong shadowing in the middle of the picture. This happens when the camera
enters a shadow volume. The polygons of the originally closed volume are clipped against the z near plane and the volume is opened.
There is a nice solution to that famious capping problem by John Carmack but it works only with 8 Bit stencil buffer depth. On Dreamcast
we have some kind of what I call 1.5 Bit stencil buffer. For one volume object there is only 1 Bit stencil, so either in or out. But you
can have multiple overlapping separated volumes without any problems. So what we have to do is to generate capping polygons at the znear
plane in order to close the clipped volume.


I wrote some cheap algorithm that generates capping polygons based on the clipping information. It does not work for all arbitrary meshes
but it turned out to be fine in normal cases. You usually don't have such strange volume meshes like spheres or tori, but rather cylinders and stuff.


Above you can see some multi texturing and environment mapping with specular highlights. On the left there is only one environment
texture, on the right there is a base texture and an environment map that makes up the black blots.
On Dreamcast there is no real multitexturing support in hardware. Each additional texture layer must be rendered with translucent
polygons, i.e. you have to send almost the same geometry vertex data to the graphics chips multiple times. My intention was to
reduce the burden on the CPU (all geometry processing is done by the CPU on Dreamcast) by organizing the data in such a way that
it could easily be cloned in one go. And in some cases it is even almost for free!


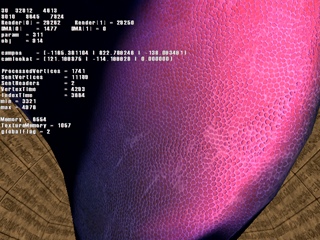
Now that we've got multitexturing up and running we can continue with some more interesting stuff: The bump mapping.
I don't remember seeing any game out there that makes use of it. But I also must confess that you won't be able to recognice it
when you don't know it's there in some cases. On Dreamcast bump mapping can be done quite easily, too. Basically all you have to do
is just a lookup table for the atan2 computation. However, things get complicated again if you want more than one light source to affect the bump mapping surface.
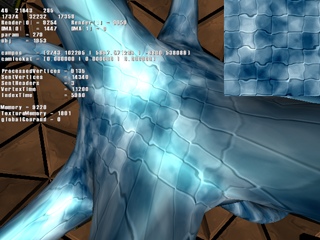

Left image: no bump map.
Right image: heavy bump map applied, looks damn cool when you move the light source.
Bottom image: base texture + bump map + environment map (pink / black)
Last but not least some standard post processing effects.
Top left: normal image.
Top right: noisy pixel displacement.
Bottom left: box filter blur.
Bottom right: radial blur / crash zoom.


